Step 1: Go to Online Membership home page, or go to address bar to type the link www.member.com.my In the Online Membership home page, click on ‘Login’ section.
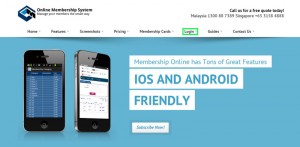
Illustration 1: Online Membership Home Page

Illustration 1: Online Membership Home Page
Step 2: Login to your Online Membership account.
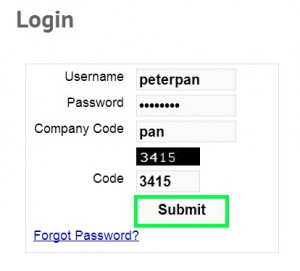
Illustration 2: Login to Online Membership Account

Illustration 2: Login to Online Membership Account
Step 3: Under your Online Membership account home page, go to Item > Item > New Item.

Illustration 3: Online Membership Account Home Page
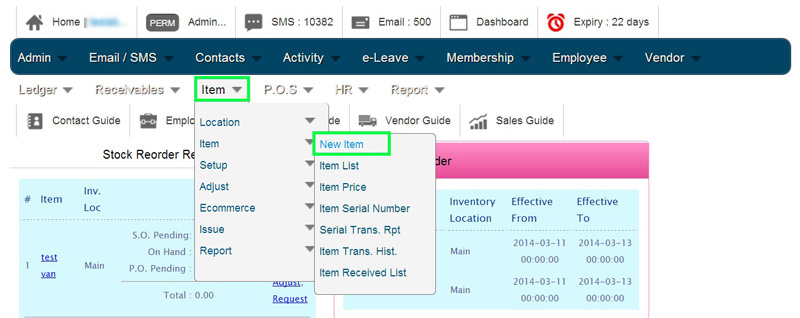
Illustration 3: Online Membership Account Home Page
Step 4: In the ITEM INFORMATION, insert item name in the ‘Item Code’ column.
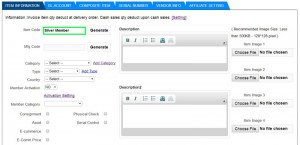
Illustration 4: Insert Item Name

Illustration 4: Insert Item Name
Step 5: Scroll down and select an item Category.

Illustration 5: Select Item Category
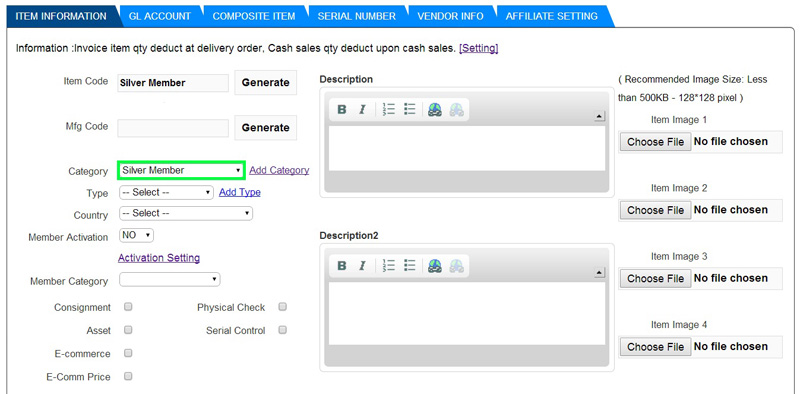
Illustration 5: Select Item Category
Step 6: Scroll down and select ‘YES’ for Member Activation.
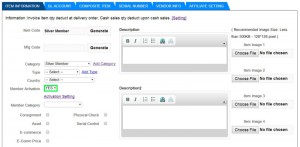
Illustration 6: Select Member Activation

Illustration 6: Select Member Activation
Step 7: Click on ‘Activation Setting’.
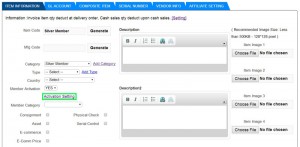
Illustration 7: Click on ‘Activation Setting’

Illustration 7: Click on ‘Activation Setting’
Step 8: Make sure you have inserted all details for Membership section. For More Details, click here. (link to contact setting guides).
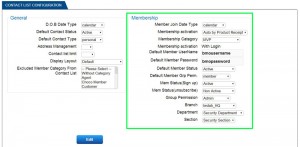
Illustration 8: Insert All Details for Membership Section
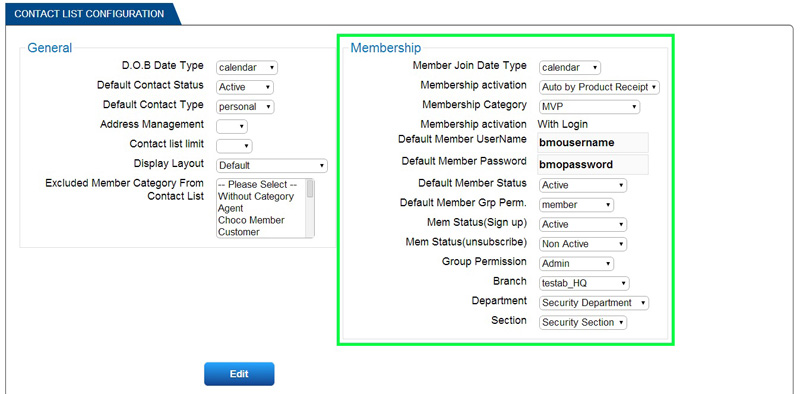
Illustration 8: Insert All Details for Membership Section
Step 9: Click ‘Edit’ to apply.
Illustration 9: Edit Membership Section
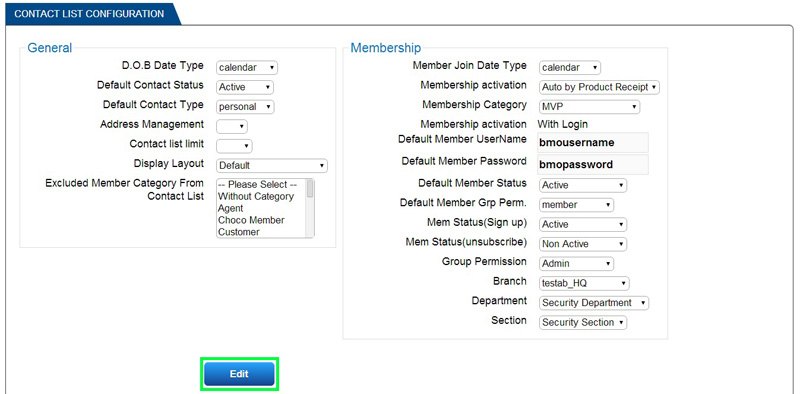
Illustration 9: Edit Membership Section
Step 10: A message box will pop out and show that contact setting is updated successfully.
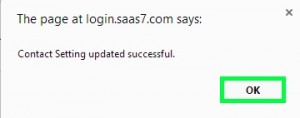
Illustration 10: Contact Setting Updated Successful

Illustration 10: Contact Setting Updated Successful
Step 11: In the ITEM INFORMATION, continue to select ‘Physical Check’.
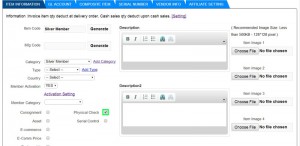
Illustration 11: Select Physical Check

Illustration 11: Select Physical Check
Step 12: Scroll down and select an usage unit for item.
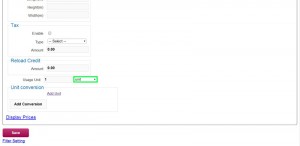
Illustration 12: Select Usage Unit

Illustration 12: Select Usage Unit
Step 13: Then, click ‘Save’ to apply new item details.
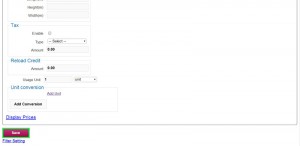
Illustration 13: Save New Item Details
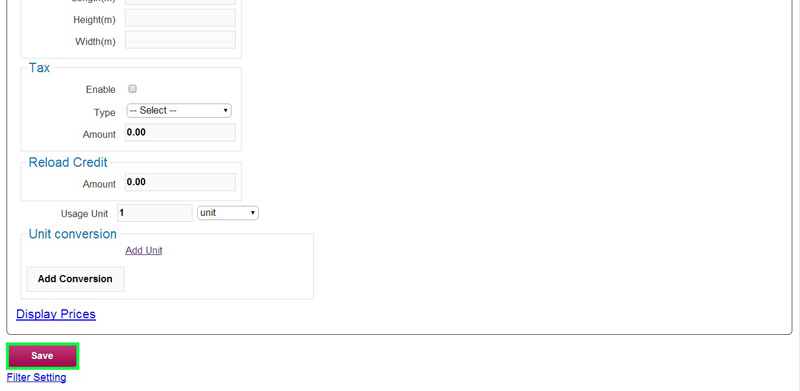
Illustration 13: Save New Item Details
Step 14:After successfully inserting new item details, a message box will pop out and show that you have successfully added new item. Click ‘OK’ to dismiss the message.

Illustration 14: Successfully Added New Item
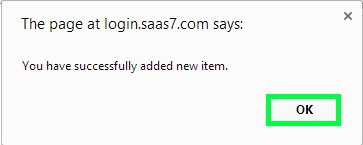
Illustration 14: Successfully Added New Item
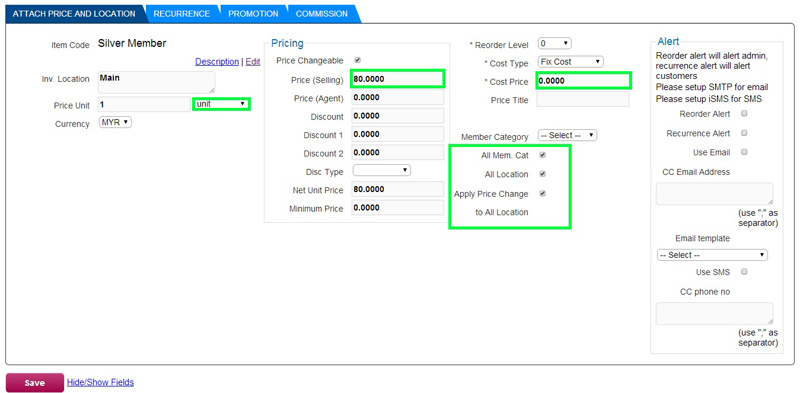
Step 15: An item price page will pop out.
* Select price unit for item.
* Insert item selling price and cost price.
* Select item price apply for all member category, all location and apply price change to all location.
Illustration 15: Edit Item Price Page
* Select price unit for item.
* Insert item selling price and cost price.
* Select item price apply for all member category, all location and apply price change to all location.
Illustration 15: Edit Item Price Page
Step 16: Click ‘Save’ to proceed.

Illustration 16: Save Item Price Changes
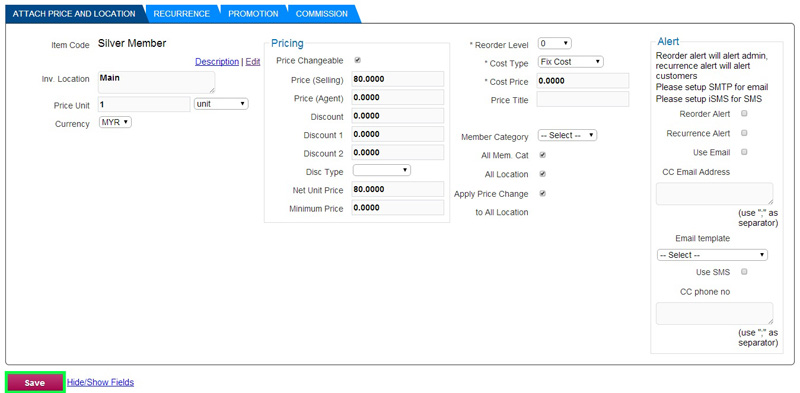
Illustration 16: Save Item Price Changes
Step 17: A message box will pop out and show that item location and price are attached. Click ‘OK’ to dismiss the message.

Illustration 17: Item Location and Item Price Attached
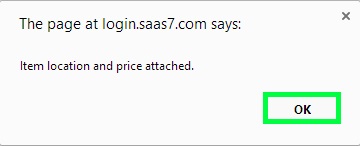
Illustration 17: Item Location and Item Price Attached
Pingback: dutasteride for women topical
Pingback: zoloft 50 mg tablet